Image Magnification
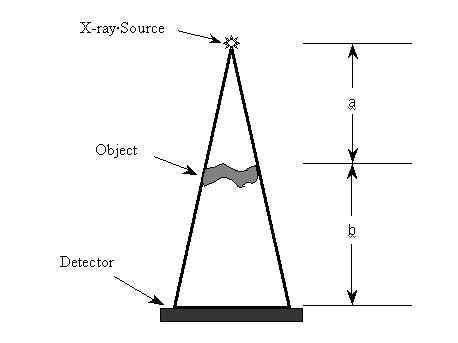
Sometimes the distance between test specimen and image detector is increased to obtain magnification in the image. Magnification is especially useful when parts being inspected and their details are very small. The farther the test specimen is from the image detector, the greater the magnification achieved. The amount of magnification can be calculated using the following formula.
M = magnification
a = distance from the source to the object
b = distance from the object to the detector

In RTR, focal-spot sizes as small as 10 microns are used to allow for magnification of the image and yet keep the penumbra to a minimum. One micron or micrometer (my-króh-mee-tuhr) equals one-millionth of a meter (0.000001 meter, or .001 mm, or .00003937 inches, or 1/25,400 inch). If a newspaper sheet is .003 inches thick, it is approximately 76 microns thick. One disadvantage of magnification is that the field of view is decreased. When the viewable area becomes smaller, this generally increases the inspection time. Refer to the applications booklet for a worksheet involving magnification problems.
More information on metric/English conversion may be found in the Appendix I. Penumbra work problems are provided in Appendix II